How to make the pulsing synth sound you love
Pads are better with a pulse. They add a heartbeat, excitement, and depth to your playing. That’s why so many songs being made now, and honestly for the last long time, incorporate this element. Think about the chorus of “I got a feeling”, or [ Insert accurate song title here ]. There is something intoxicating about the constant rise and fall of the volume: We feel its pulse, and it resonates with us. It gives the impression that the music is alive and moving.
If you haven’t noticed this before, now that I’ve pointed it out, you will hear it everywhere.
So how do we go about making it?
Traditionally, this effect is created using something called sidechained compression.
What the heck is that?
Well, that’s a good question.
A compressor squeezes ( or compresses if you will) the loudest parts of a waveform down, and the quietest parts of a waveform up. This results in a generally more consistent volume.
The actual amount of compression is decided by how much incoming signal passes over the threshold, and the ratio of compression you choose. ( for example a 2:1 ratio will subtract 2 DBs of volume for every 1 DB over the threshold your signal passes)
When a compressor is sidechained, the amount of compression applied to a sound is based on an incoming signal from a different source than the one you are compressing.
The vibe we are creating has highs on the upbeat and lows in the downbeat. So we want to apply compression on every beat and release the compressor for the upbeat.
we will place a compressor on the end of our pad chain, side chain the compressor to a kick drum playing each downbeat.
The less traditional way, and my new favorite discovery.
If you have max for live, you can also make use of the LFO plugin to create the same effect.
The Steps
Side chain method
Step 1: create one audio channel strip and one midi channel strip
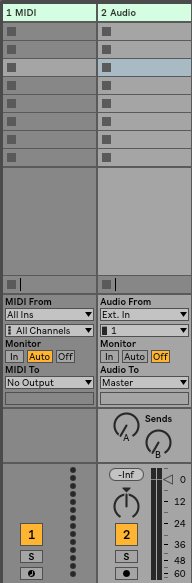
Step 2: add a four on the floor kick sample to your audio track. Any sample will do, but if you don’t have one, you can download mine here.
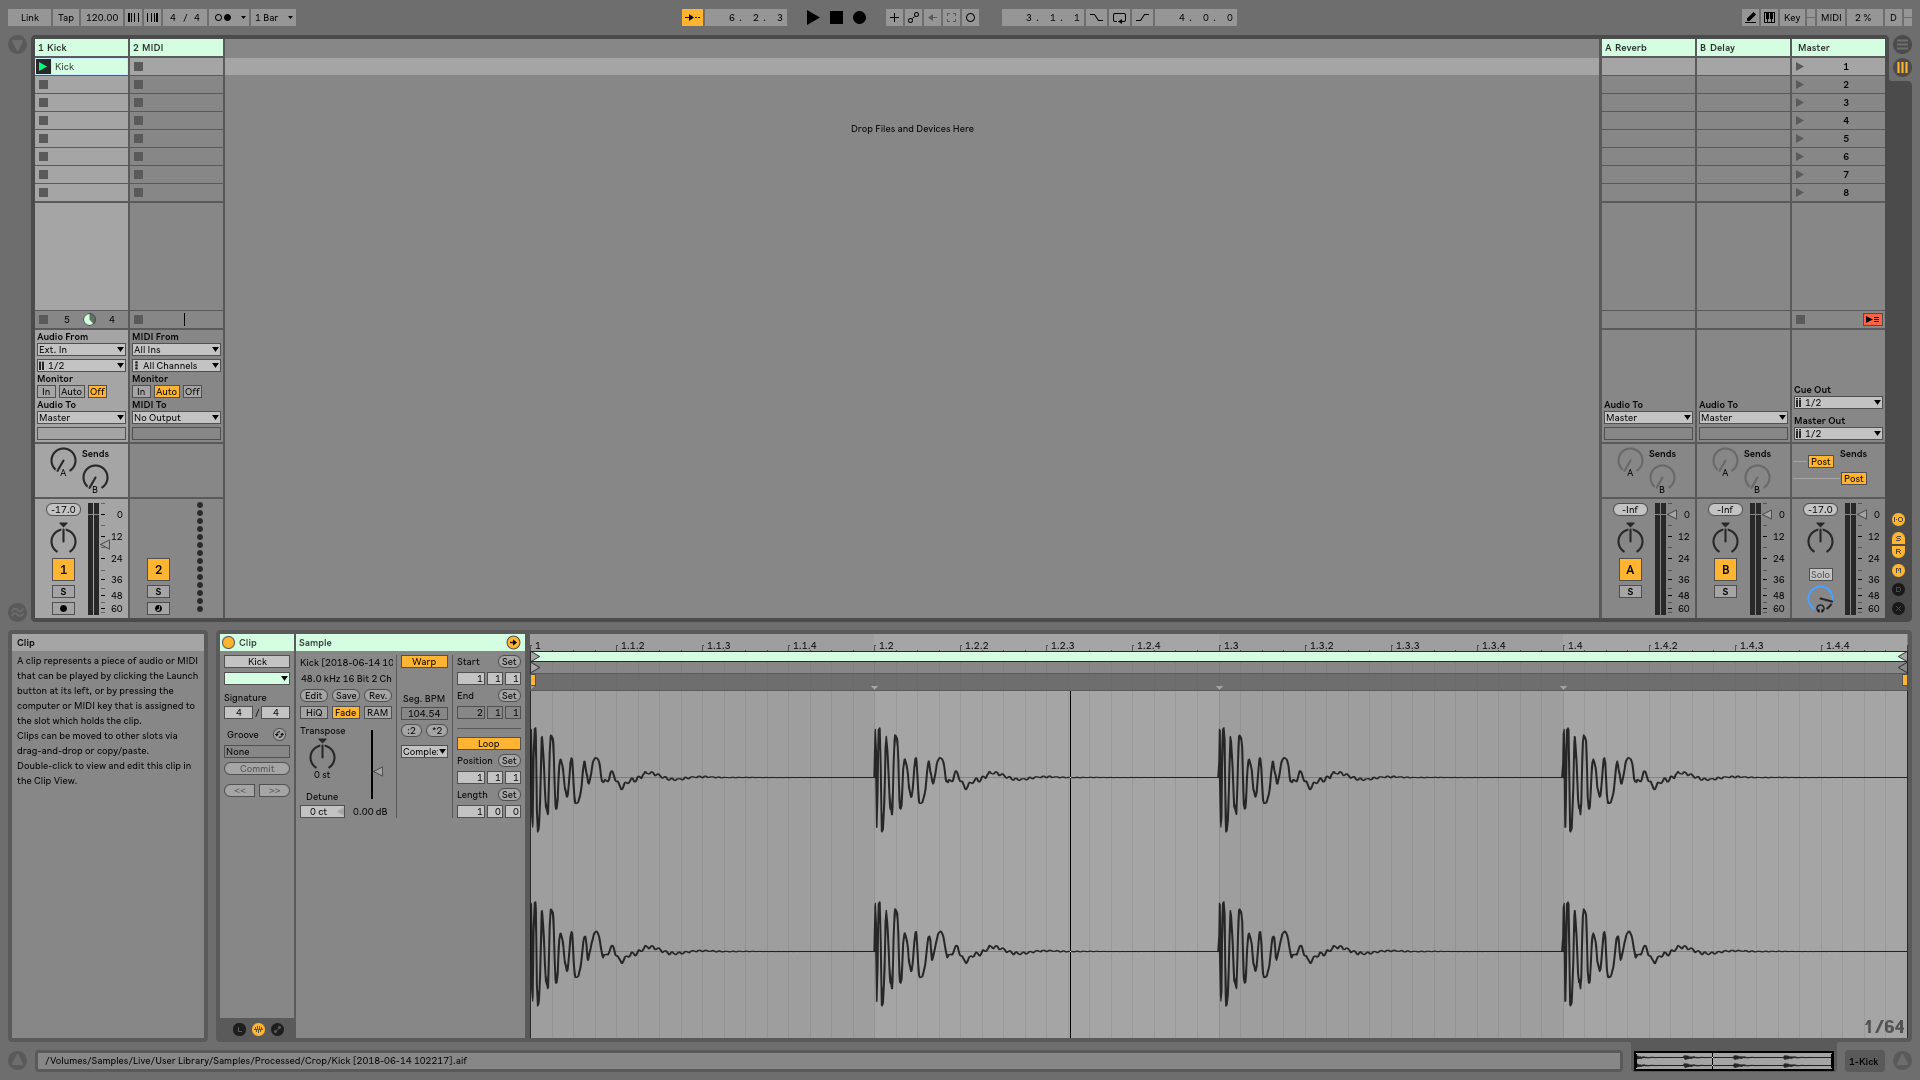
Step 3: Add the pad sound of your choice to your midi channel. Any pad will work, but If you need one, you can download mine here.
Step 4: Drop a compressor as the last device in your chain.
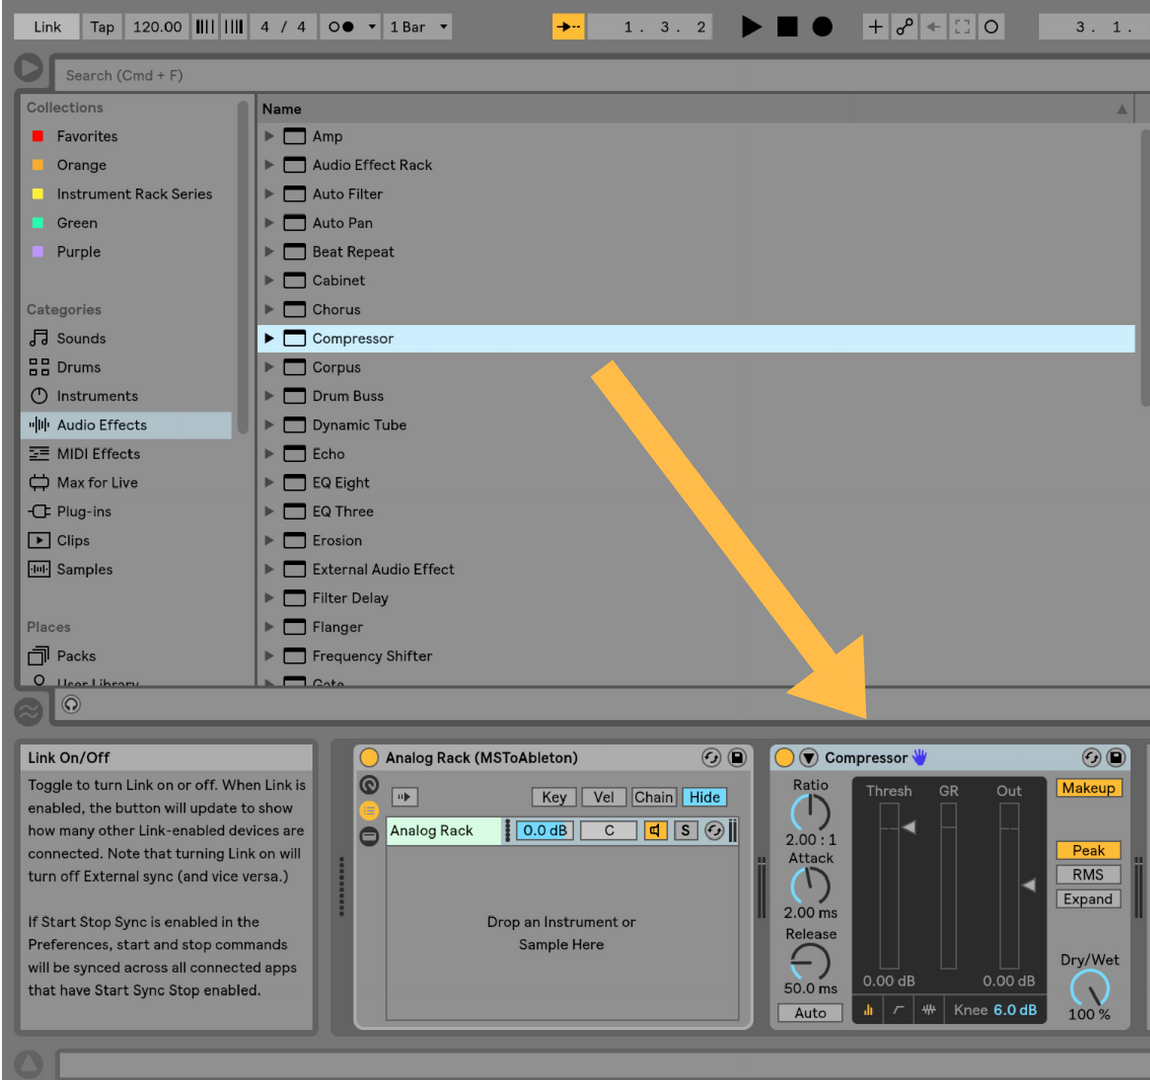
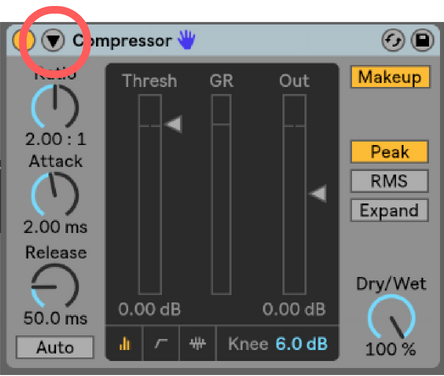
Step 5: open the details of the compressor by clicking on the little arrow on the left
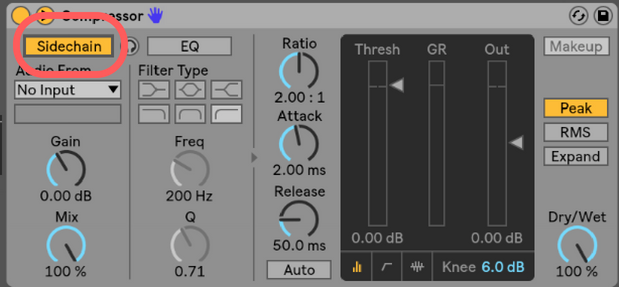
Turn the side chain on by clicking sidechain (you’ll know it’s right when it turns yellow)
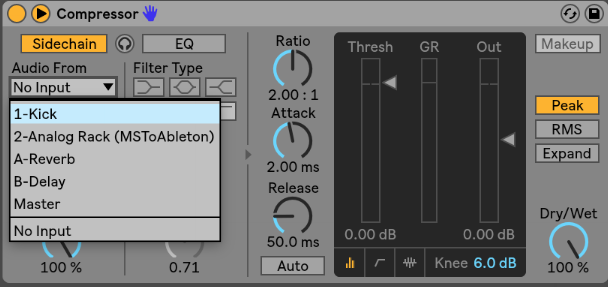
Step 6: set your signal source as the channel strip containing the kick, in our case, ” 1-Kick”.
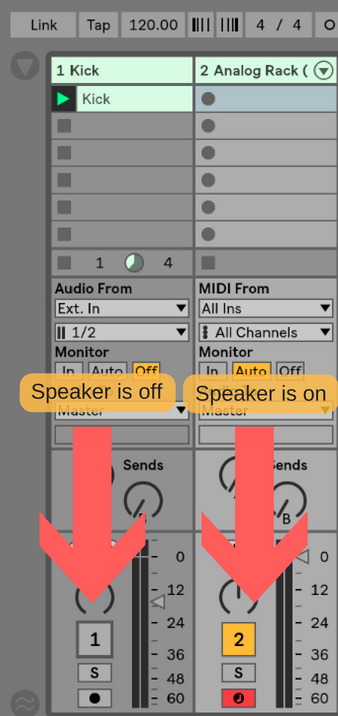
Step 7. Turn the speaker of your kick drum off
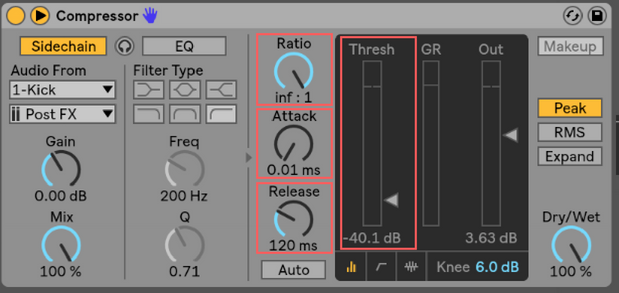
Now we want silence (or close to it) on the downbeat, and a slow swell back to full volume by the upbeat. These are the settings I use to achieve that.
Ratio: Inf:1
Attack: .01 ms
Release: 12oms
Threshold: To tase depending on your incoming signal.
Step 10: Test! Fire the kick clip, and play some chords on your synth.
The same method can also be used if your pad is an audio clip as opposed to an instrument you are playing.
If you are using this method live, you can create several copies of your kick for each master scene and tempo change so you have access to this effect at any tempo. It can also be helpful to map the threshold either to a macro, or a knob on your controller so you can control the amount of pulsing you have at any given time. This will also allow you to bring the pulse in and out as you please.

The LFO method
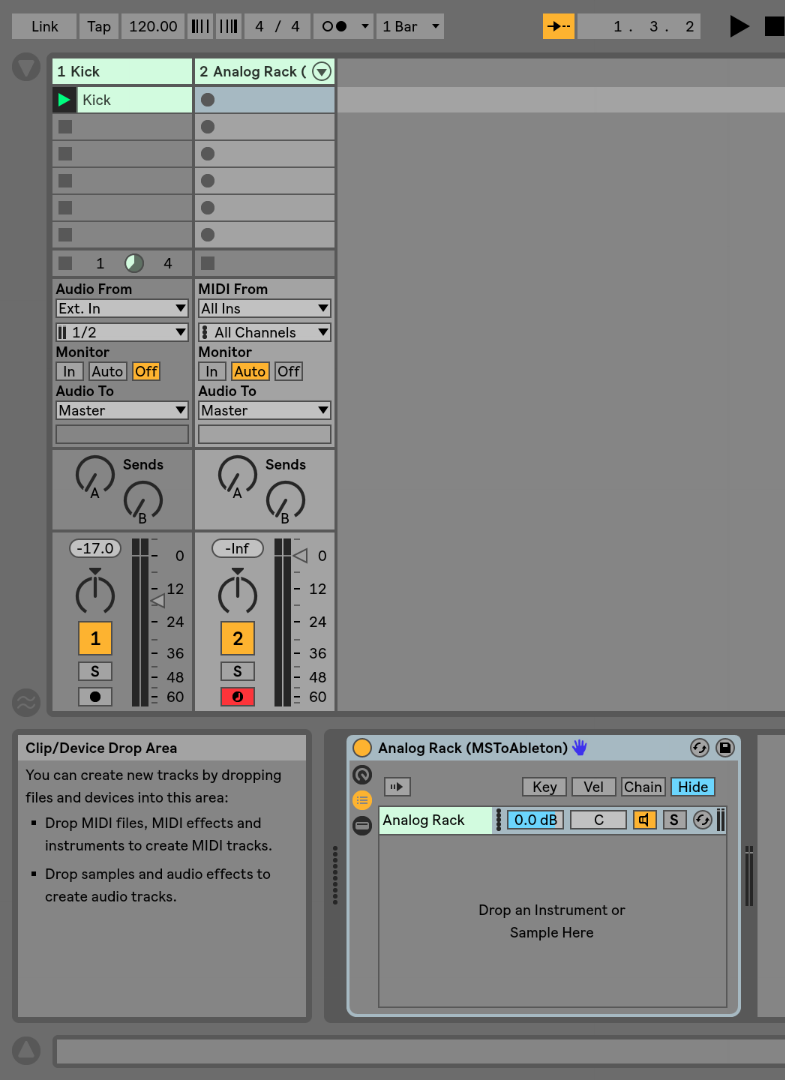
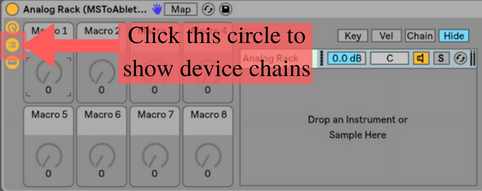
Step 1: make sure your pad is in an instrument rack, and the device chain is visible.
If it isn’t, you can quickly create an instrument rack by selecting your plugin and pressing command G
Step 2: Instead of the Compressor at the very end of your pad chain, add the max audio effect LFO from your browser.
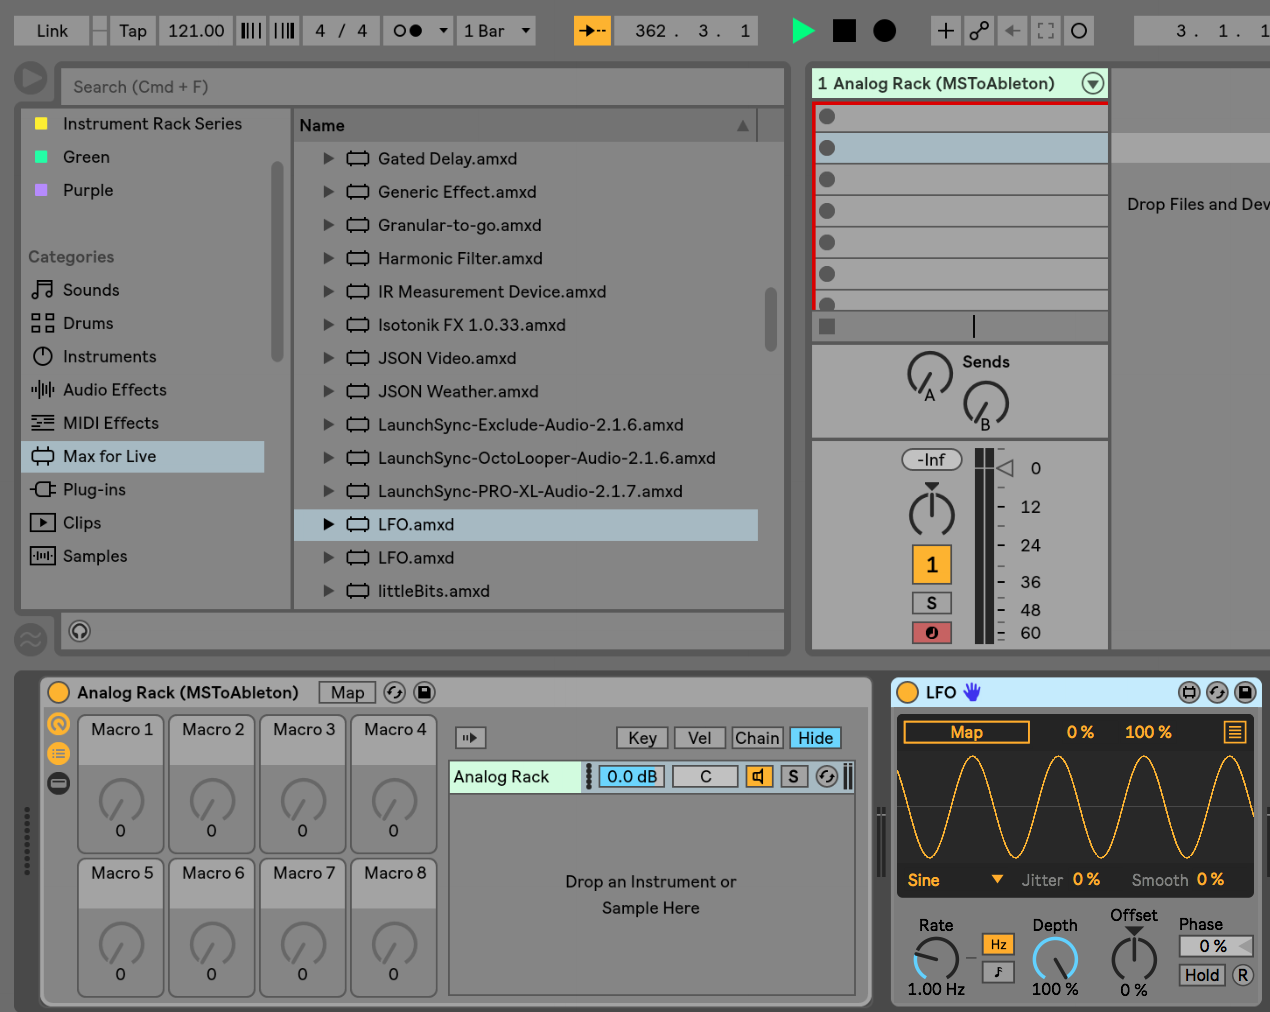
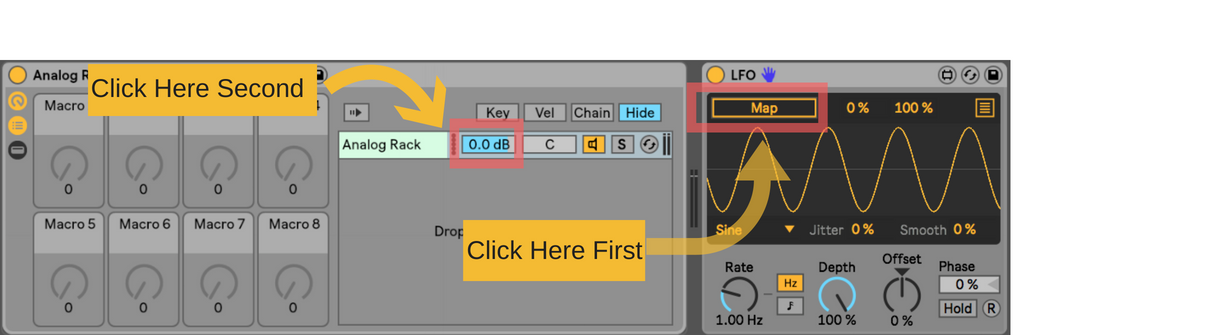
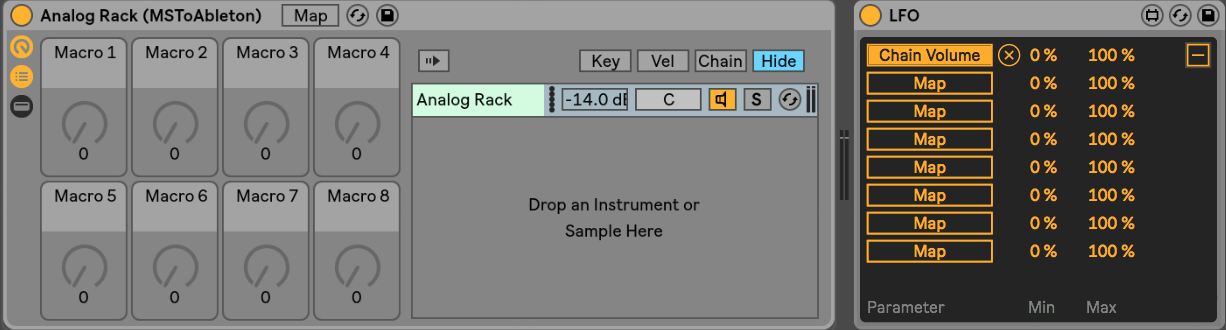
Step 3: Click the map button on your LFO on the top of your LFO plugin. Map will begin to flash. Next click on the chain volume to the right of your pad title.
Step 4: Choose the “up” wave from the drop-downown menu at the bottom of the LFO plug in

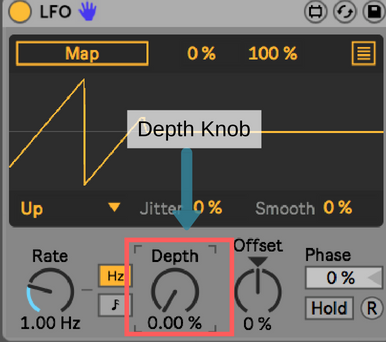
Step 5: Move the Depth knob to zero.
Step 6: open up the details by clicking the three line button on the top on the plug in.
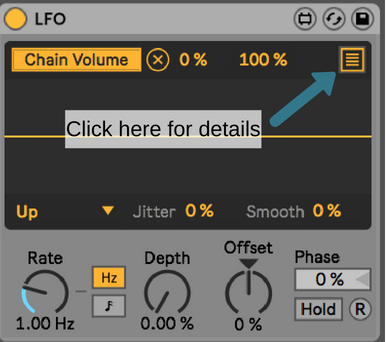
This menu will be revealed
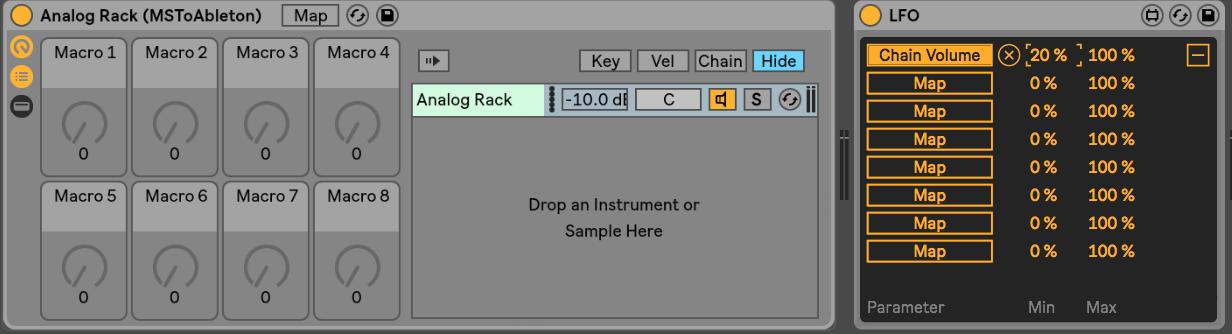
Step 7: adjust the minimum percentage until the chain volume displays what you want your maximum volume to be. (When the LFO intensity of turned all way down, your synth volume will play at the lowest set volume. )
Step 8: Map a knob to the Depth knob on the LFO device.
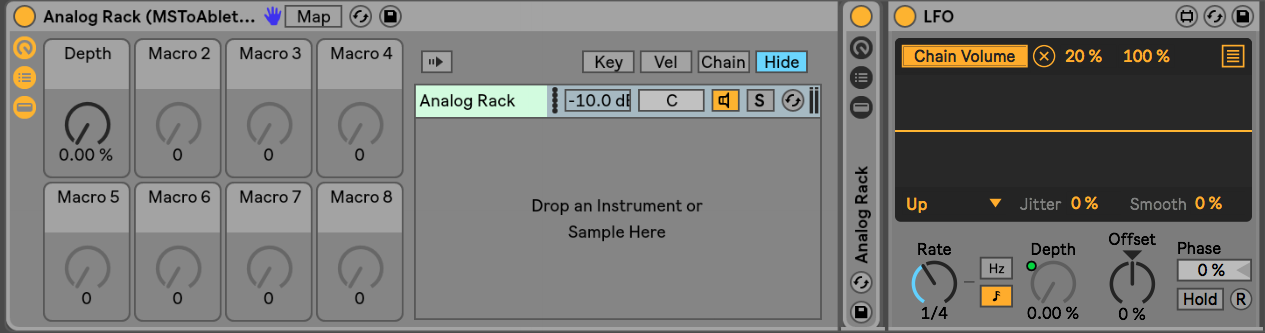
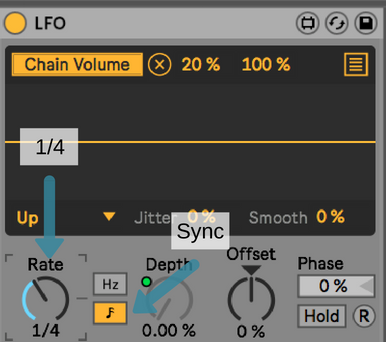
Step 9: Adjust the rate to “Sync” And 1/4
Step 10: Test!
Play your pad sound and slowly increase the LFO’s intensity.
You will hear the same steady pulse that you achieved using the sidechaining method.
And that’s all she wrote, folks.
I would love to be a support to you, so please reach out with any questions or content you would like covered via our contact page.
To stay the most up to date, subscribe to my newsletter here, and join our Facebook Group!