Using a metronome is a daily task for many of us. We use it when we record, when we are playing live, when we are creating, when we are practicing music, when we are mowing the lawn…
The list goes on and on.
Today we are going to take an in-depth look at Ableton Live’s built-in metronome to see how it works, check out its features, and get the most out of it.
Ableton’s Metronome
First things first, we gotta find this thing!
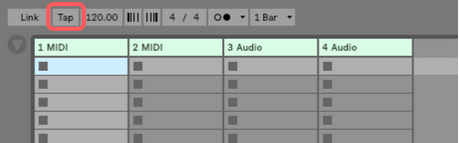
Ableton’s metronome is located at the top left-hand corner of the screen.
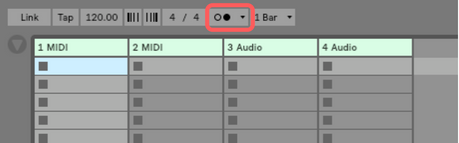
If the metronome is greyed out, it is off, and it if its colored in than it is on.
![]()
![]()
Metronome Sounds
Ableton’s metronome offers three different sounds to choose from. They can all be accessed by clicking on the drop-down arrow to the right of the metronome button.
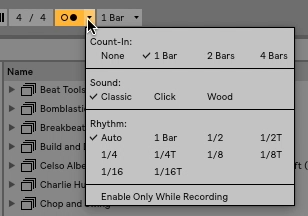
Classic: This click sound has been around for a while, and is Ableton’s default click sound. I have come to really like this click, though, for many, it is a bit too forward and has a little too much pitch. For all of those people, Ableton has two other options.
Click: This sound is reminiscent of a classic recording metronome. It bears quite a similarity to the clicking that can be heard during The Beatle’s “Blackbird”.
Wood: Wood’s sound is identical to that of the woodblock sound, hence where it gets its name.
Which sound is best?
Well, that’s all personal preference. Listen to each and see which one works best for you.
Count-in Options
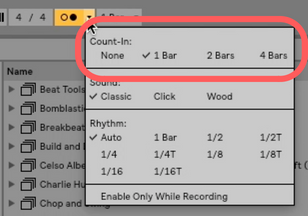
If you are using Ableton’s metronome while you are recording, this section is for you. The drop-down menu is also where you set the count in length that happens before you start recording. It can be as little as, “none”, or as large as, “4 Bars”
Rhytmn
Of all the new features in Ableton 10, I am most excited about this part of the metronome. The rhythm section allows you to choose your preference in subdivisions. Many times when I am playing with a live band, I want to send them a click that is subdivided by 8th notes. In the past, I would need to change my time signature to 4/8, but now with this setting, all I need to do is go in and change the rhythm setting. this is extremely handy.
Adjusting Tempo
Your tempo can be adjusted just to the left of your metronome on/off button. By default, a new Ableton project opens at 120.
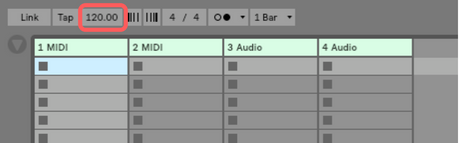
The Tempo can be adjusted in three ways:
Clicking and dragging on the tempo will allow you to move the tempo up and down.
Using the tap tempo button just to the left of the temp marking will adjust the tempo to match what you tapped in. You can either do this using your mouse or a mapped button on a controller or keyboard.
The last way to adjust tempo, and I think the most useful way for a live set, is to enter text into the master scene. Once a correctly labeled scene is fired, Ableton will automatically adjust the tempo, and even the time signature to match.
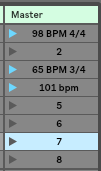
You will notice that once time or tempo information is entered, Ableton’s fire buttons for that scene turn blue. If the fire scene button hasn’t changed color, double check you’ve set it up right.
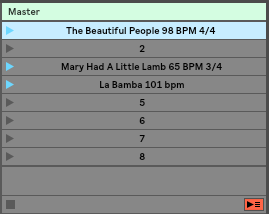
It also bears mentioning that if you want to also include song text in a master scene with tempo information, Ableton will still recognize it. For example…
Gradual Tempo Nudging
If you happen to be playing with a live band that uses clicks, you may notice that sometimes, especially at the more exciting parts of songs, there could be a tendency to rush ahead of the click a little bit. Moving up the metronome a full click can often be very jarring. Thankfully, Ableton has provided a nudge forward and a nudge backward button to gently adjust the tempo, temporarily, to help keep a band on the click. Those can be found here…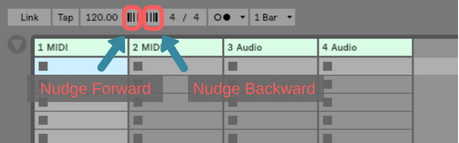
That’s all she wrote folks! To stay up to date with our latest blog posts, join our facebook group here. Also as always, I would love to be a resource to you, so reach out to me through our contact page, and as always, happy creating!