A filter can do a lot to sound. You can think about it much like an EQ. As a matter of fact, an EQ is capable of many of the sound shaping functions that the auto filter is capable of.
So what is the main difference?
I like to think of an EQ as a way to mold a sound that you like to fit in with the other sounds that are happening. It is designed to be more of a mixing tool than an audio effect.
I like to think of a filter as a way to drastically change the sound for artistic effect. It has more to do with what a specific sound will be sound like, than how it fits with the rest of the track.
The auto filter also has some features that a regular EQ doesn’t have such as an envelope follower, and a built-in LFO.
In some ways, this question is a lot like asking the difference between a compressor and a limiter.
As we talk about the auto filters features, It will begin to make sense why you may choose one over the other.
Why Its Essential
Although auto filter has 5 different types of filters built in, for the rest of this article I will be focusing primarily on the Lowpass Filter setting. I have found this filter to be the most helpful for playing keyboard live.
Auto Filter multiplies sound possibilities
Using a lowpass filter can take a sound that is loud, gritty and in your face, and transform it into a warm and gentle sound perfect to go behind a piano.
Using the LFO can add a rhymic element to a static synth
The quantize function creates an almost arpeggiator like quality to your pads
Only Simple Mappings Needed
Once you have your filter set, you can really map just the frequency knob, and the LFO. Using just two controls, you already have a ton of sound control. It leaves you with many other open knobs, depending on your controller, to map.
Auto Filter Sounds Good On Most Patches
In my live set up, auto filter it a part of every one of my effects chains. It sounds great on pads, piano, EP, Leads, Strings. Really anything you can think of.
It has a distinct quality, so it’s easy to imagine how a sound will be affected by using it.
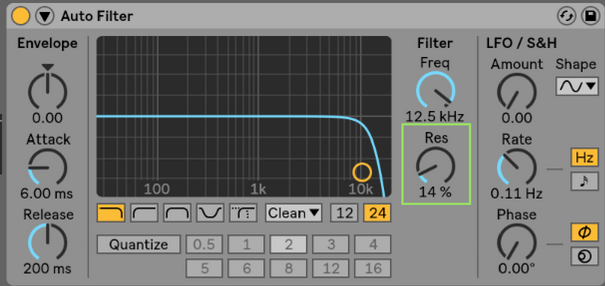
Auto-Filter Features
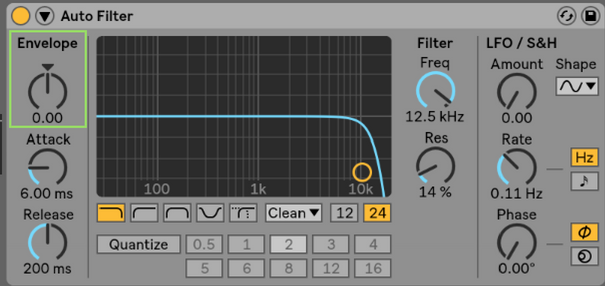
Frequency: Control the frequency where the filter will be applied

Resonance: Boost the signal just before the cut-off frequency
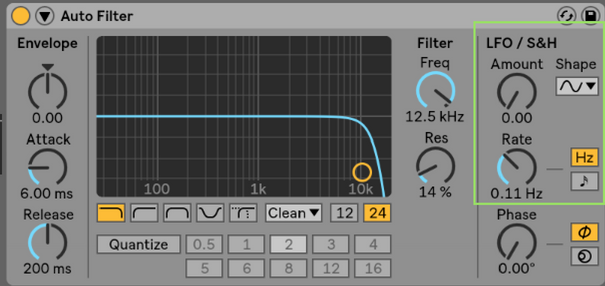
LFO: Seven different wave settings for LFO, and the ability to sync to the metronome, or to a rate in Hertz.
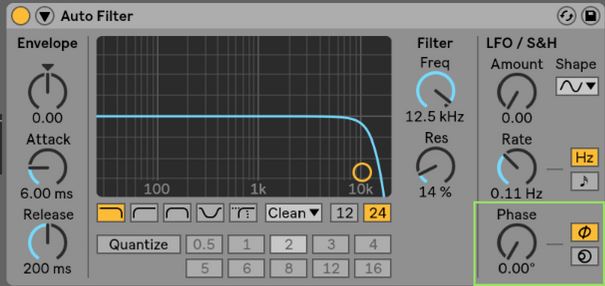
Phase Adjuster: the auto filter is a stereo effect! So sometimes adjusting the phase is essential to getting the desired effect from this device
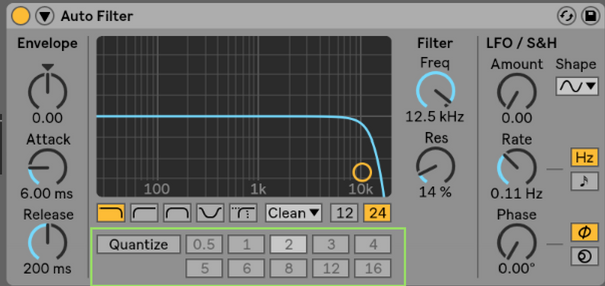
Quantize beat: The quantize beat setting is best used in conjunction with an LFO. Rather than outputting a smooth transition as the filter frequency changes, auto filter outputs changing frequencies, every time a certain duration of time has passed.
Envelope: Follows the shape of an incoming signal and adjusts the filter open or closed according to your settings.
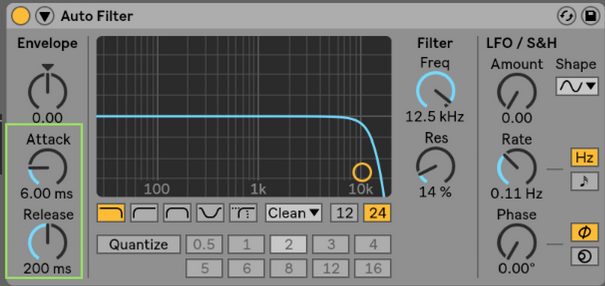
Attack and Release: Sets the attack time and the decay time for the filter when making use of the envelope feature
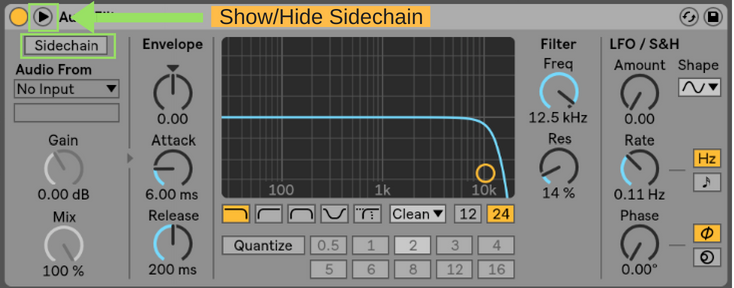
Sidechain: The ability to follow the envelope of a secondary signal to change the frequency cut off.
How I Use Auto Filter
Before any audio leaves Ableton, it passes through one of 4 audio busses where most of my audio effects are processed. The first device in my chain is the auto filter set to the Lowpass Filter setting.
For each of my 4 channels, I have a knob mapped to filter frequency and a knob mapped to LFO amount. This allows me to control how much high end I am letting through for any given category of sound.
Specific Uses
EP: I create a slow attacking verbed out EP by setting my filter cut-off around 1.3 kHz, and putting my reverb knob up all the way at 100%.
Leads/Pads:
Transform a noisy earth shattering lead synth into a pad by setting the cutoff at about 600 hz
Create a rhythmic effect by putting the frequency at 700 Hz, putting the phase to 90, LFO to 1/4 and quantize to 16.
Piano:
The Piano in the other room effect. Use the lowpass filter to sweep off a good deal of high end, and then add just a little touch of reverb.
Alright, now get out there and make something you are proud of! Then head over to my facebook group and join myself and a community of Ableton users who are there are ready to support you on your journey.
Looking forward to seeing you there!
Until next time, happy creating
-Brett