Delay can add a lot by doing a little. Admittedly this post transformed into to something different then I intended as I explored the Ping Pong Delay. In all of this, my passion is using the software as a piece of my instrument. When an electric guitar player plugs into their pedal board, the board is no less a part of their instrument than the guitar.
As a keyboard player, how do I use my software the same way?
This is a question I ask myself often.
This post comes from that place. And I know you are going to love this approach to using delay.
What is Delay?
Delay is an audio effect that takes a part of your signal, and repeats it after a given amount of time has passed. Traditionally it is used as a send effect, but generally speaking, a lot of software delays have a wet/dry knob that allows you to but this effect directly on a channel.
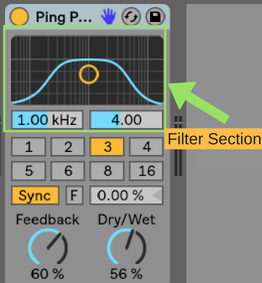
The Ping Pong Delay
Abelton has three in-house delays. The simple delay, the ping-pong delay, and echo. Today we are focusing on the ping-pong delay, though the other two are just as worthy of use.
The ping-pong delay takes an incoming signal and sends it in an alternating pattern to the left and the right of the stereo field.
At the top of the interface, it has a built-in filter so you can isolate which part of the signal you would like to be delayed.
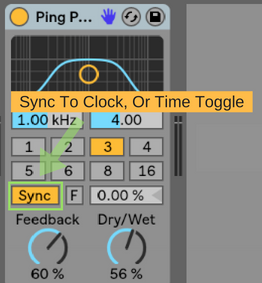
You can either sync Ping Pong Delay to the clock or set the delay time in milliseconds.
There is also a freeze button built into ping-pong delay that lets you freeze and infinitely repeat your delayed signal.
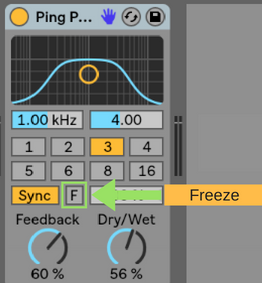
I love this feature.
The Machine I’ve Built
Your standard ping-pong delay is going to sound great in most situations. This is not what I’ve made for this blog post.
This is all about adding texture underneath what you are playing.
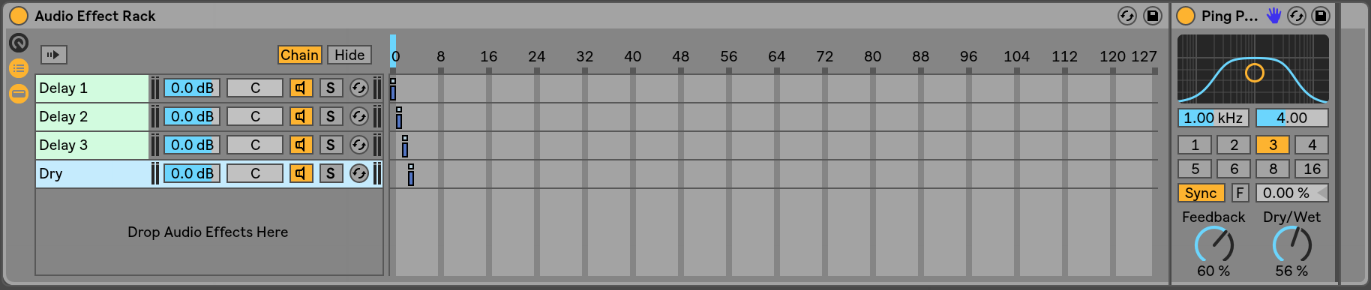
I’ve used three separate delays in an audio effect rack to create a low, mid, and high delay. Then, using the freeze button of each, I create a rhythmic canvas for me to play over.
The Steps
Step One: Add three ping-pong delays to an instrument rack.
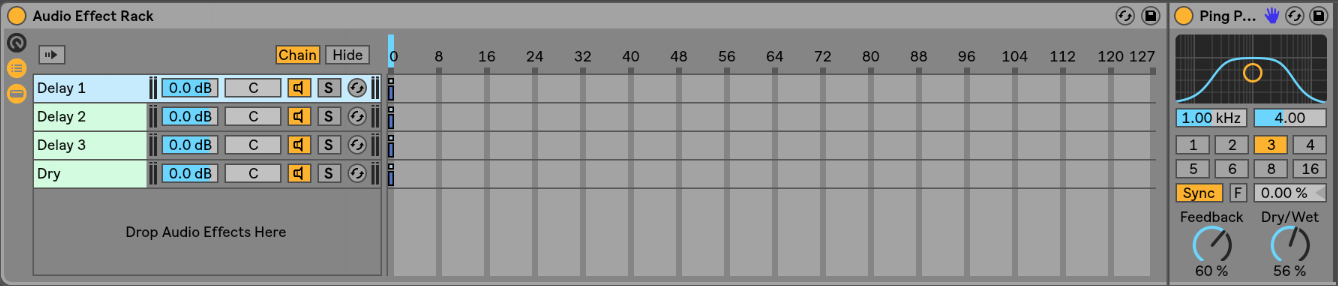
Step Two: Create one chain, and leave it empty. This is to allow some dry signal to pass through. Picture above as dry.
Step Three: Place each delay at a different place on the chain selector X-Axis
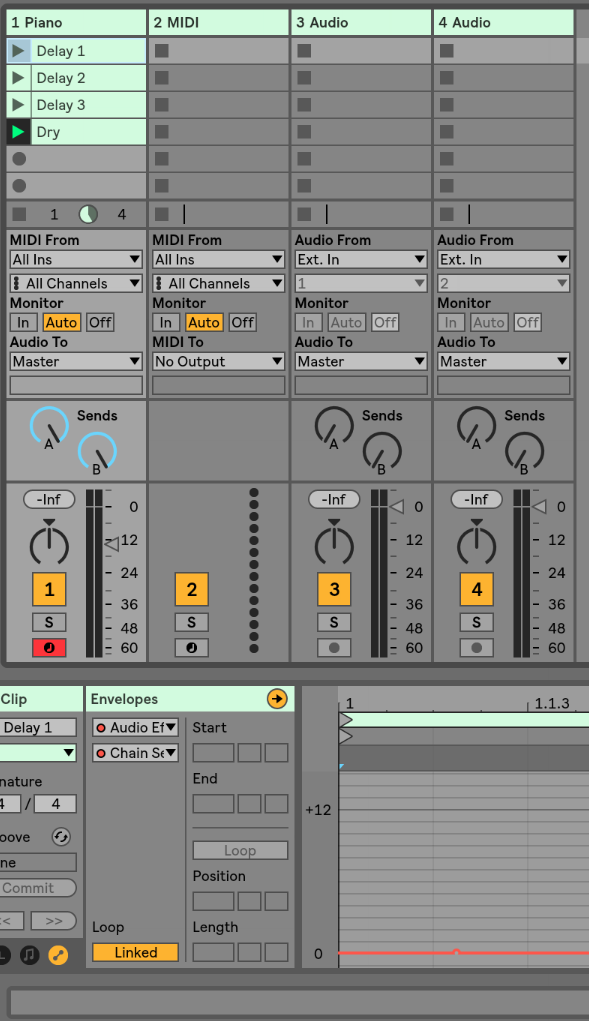
Step Four: Create four midi clips to control your chain selector. Create an envelope in each clip to move the chain selector.
Make sure your clips are not quantized in the launch tab since, for our purposes, you will want them to change parameters immediately.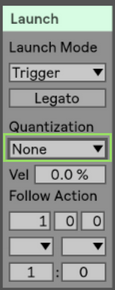
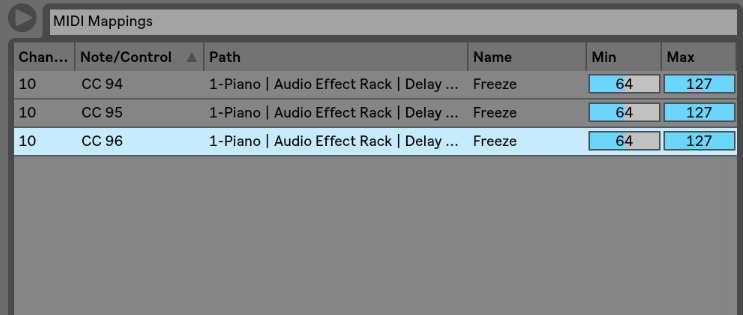
Step Five: Map one button for each freeze control.
Step Six: Create your pattern.
Play one phrase per ping-pong delay, and freeze it.
I find this makes more sense while watching the video, so be sure to check it out!
You’ve now created a very rhymic canvas for playing over. As I’ve been experimenting with this since I recorded the original video, I have added a reverb to the end of this chain so I can play a bit more with some ambiance. I highly recommend giving that a go as well.
Alright, now get out there and make something you’re proud of. You are already taking great steps towards making awesome music, and I’d love to be a continued support to you. The best was to connect with me directly is to head over to my Facebook group. There you will find me, and a whole community of Ableton learners that will be able to help you on your journey. It’s a great place to give and receive support.
Looking forward to seeing you there.
Until next time, happy creating.
-Brett