Creating keyboard splits in Ableton like you can in MainStage
Setting a keyboard split in Ableton is a necessity. As keyboard players we are constantly required to perform musical acrobatics, playing several sounds at a time, and often covering different types of sounds and textures simultaneously. Simply because of the nature of the beast, it is essential that we can assign different sounds to different zones on our keyboard. MainStage does this using its layer editor, which is super intuitive in its design and very easy to use. Ableton creates keyboard splits by making use of its “Instrument Rack”. Today, I am going to walk you through how to set up a keyboard split in Ableton
An instrument rack is where the magic happens inside Ableton. It’s capable of doing so much, and we are going to explore all of its possibilities in the next few series on Instrument racks. As we go on, we will dive deep, but for now, let’s keep it simple and think in terms of MainStage: An instrument rack is a container that holds your channel strips and audio effects. It also functions as the layer editor and allows you to select sounds by key range, velocity or chain.
Setting up your keyboard split in Ableton
Step 1
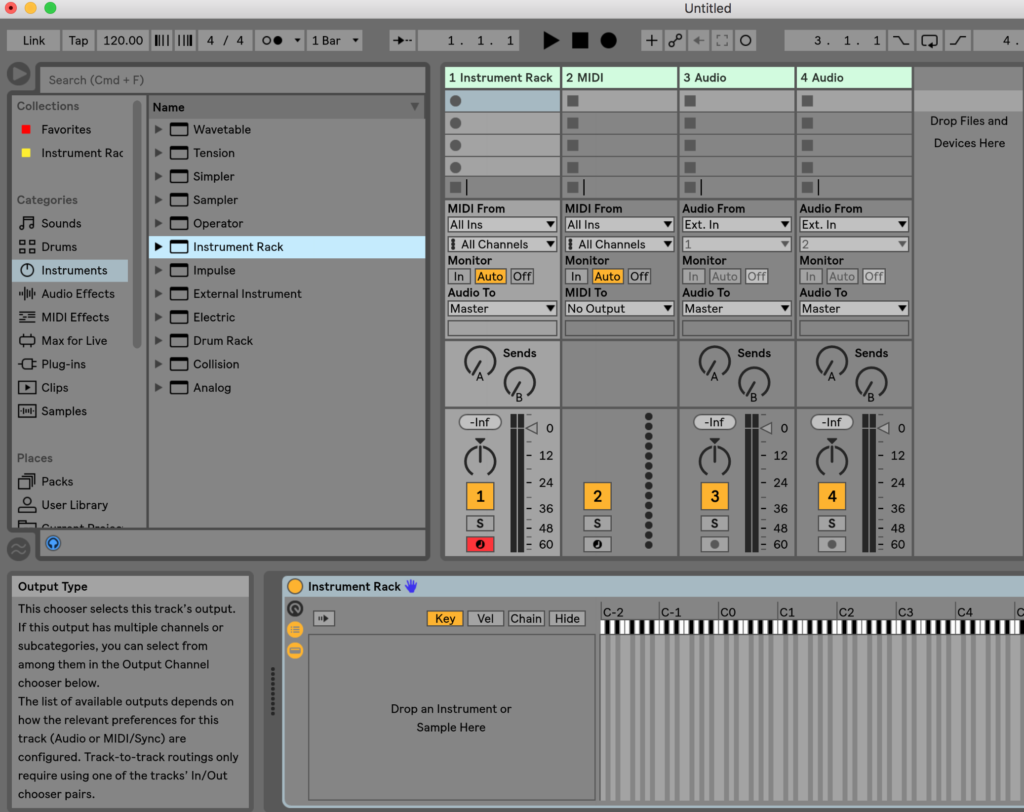
Insert an instrument rack onto an empty midi channel
Step 2
Drop your instruments into your newly created instrument rack

Step 3
Adjust your chains (big green lines) to your desired key range


Pro Tip
Ableton allows you to gradually switch instrument sounds based on range by adjusting the top line above the green arrow. So if you are hoping to slowly fade between sounds, you can adjust just the top line as below.

The top light colored green line is used to adjust your crossfade. Anywhere on the chain that is not overlined by the pale green line will receive a velocity value that is slightly less than the velocity that is inputted.
That’s all she wrote folks! Don’t limit yourself to two instruments. You can drop as many instruments into this rack as you would like, or as is applicable to any given situation. Your transition to Ableton is going smoother already! Check out out another post on instrument racks HERE to see how you can use an instrument rack to trigger different sounds based off of incoming velocity!